Before proceeding, DO NOT attempt attaching your holster onto the mount with a loaded firearm! Doing so could result in serious injury or death.
Use a common sized holster that has either a belt loop or clip on the side of the holster, located in the center. If your holster is not ambidextrous (belt loops on both sides), then you will need a left-handed holster for a right-handed draw, or a right-handed holster for a left-handed draw. We do not recommend you using a holster with more than one belt loop on the same side, snap loops, pancake holsters or paddles. If you plan to attach a wide holster, and you find the holster strap already attached to the mount is too short, simply replace the holster strap (labeled “Holster Strap”) with the longer replacement strap provided in the package. Un-Velcro and open up both the top holster strap (labeled) and the lower holster strap that is smaller in width.
Click image to enlarge
Push / thread the top holster strap through the inside of the belt loop or clip of the holster as far as it will go, until the side of the holster is flush against the side of the mount.
Pull the end of the holster strap with tension, while still keeping the holster and mount flush with each other, and wrap the strap and holster together around the front of the mount. The front is the side with our logo.
Click image to enlarge
Velcro the end of holster strap to the backside of the mount. The holster should now be snug on th mount.
Click image to enlarge
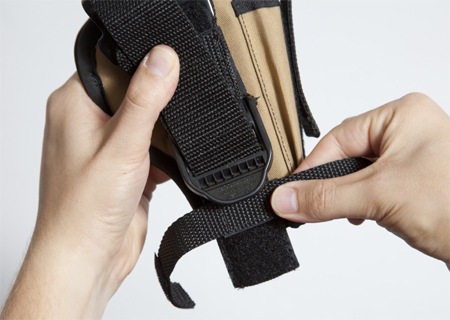
Now, position the lower holster strap where you want it along the holster. You can detach and adjust this strap vertically.
Click image to enlarge
Wrap the lower strap around your holster and attach. The mount is now ready to position in your vehicle.
Click image to enlarge
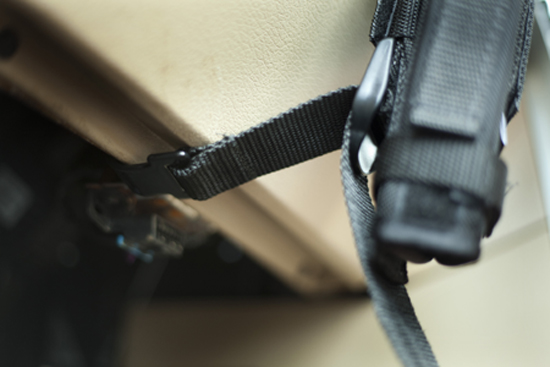
Place the top mount hook into the gap below your steering wheel column. If there is no gap, or the gap edge/lip is too thick for the hook to grab, we offer a Vehicle Adapter accessory (sold separately) on our website that will allow you to install. Please see: Vehicle Holster Mount Adapter (GCC-UVHHMA)
Click image to enlarge
Place the bottom hook so it grabs onto the lower dash panel or somewhere in this area where it will allow you to tighten firmly.
Click image to enlarge
Pull the buckle strap down hard to tighten the mount. (You may need to gently lift up on the large buckle a little to allow the strap to slide easier or try leaving some slack in the strap to get a running start before pulling. The strap material is heavy duty and will become much easier to tighten after installing a few times. You can also work the strap back and forth through the buckle to help break it in) Continue to pull until the mount is secure and tight.
Once installed, you can either tuck any excess strap material behind the holster or dash, or you can cut it off with a pair of scissors. You will want to seal the cut end using a match or lighter to prevent fraying. We recommend leaving the excess if you plan on using the mount in another vehicle, because the dash length may vary.
Your holster is now fully mounted and is ready to safely accept a firearm.
To release the mount, simply reach behind the holster and mount bar and lift up on the large buckle while pulling out toward you.